
A Step-by-Step Codex Desktop Pet Tutorial: Build an Animated Desk Companion with Hatch Pet
Build a custom desktop pet for Codex with Hatch Pet from the OpenAI Skills repo — 5 steps from reference image to install and wake-up, roughly 1 hour and 60% of weekly usage in our test.
A Step-by-Step Codex Desktop Pet Tutorial: Build an Animated Desk Companion with Hatch Pet
Build a custom desktop pet for Codex with Hatch Pet from the OpenAI Skills repo — 5 steps from reference image to install and wake-up, roughly 1 hour and 60% of weekly usage in our test.
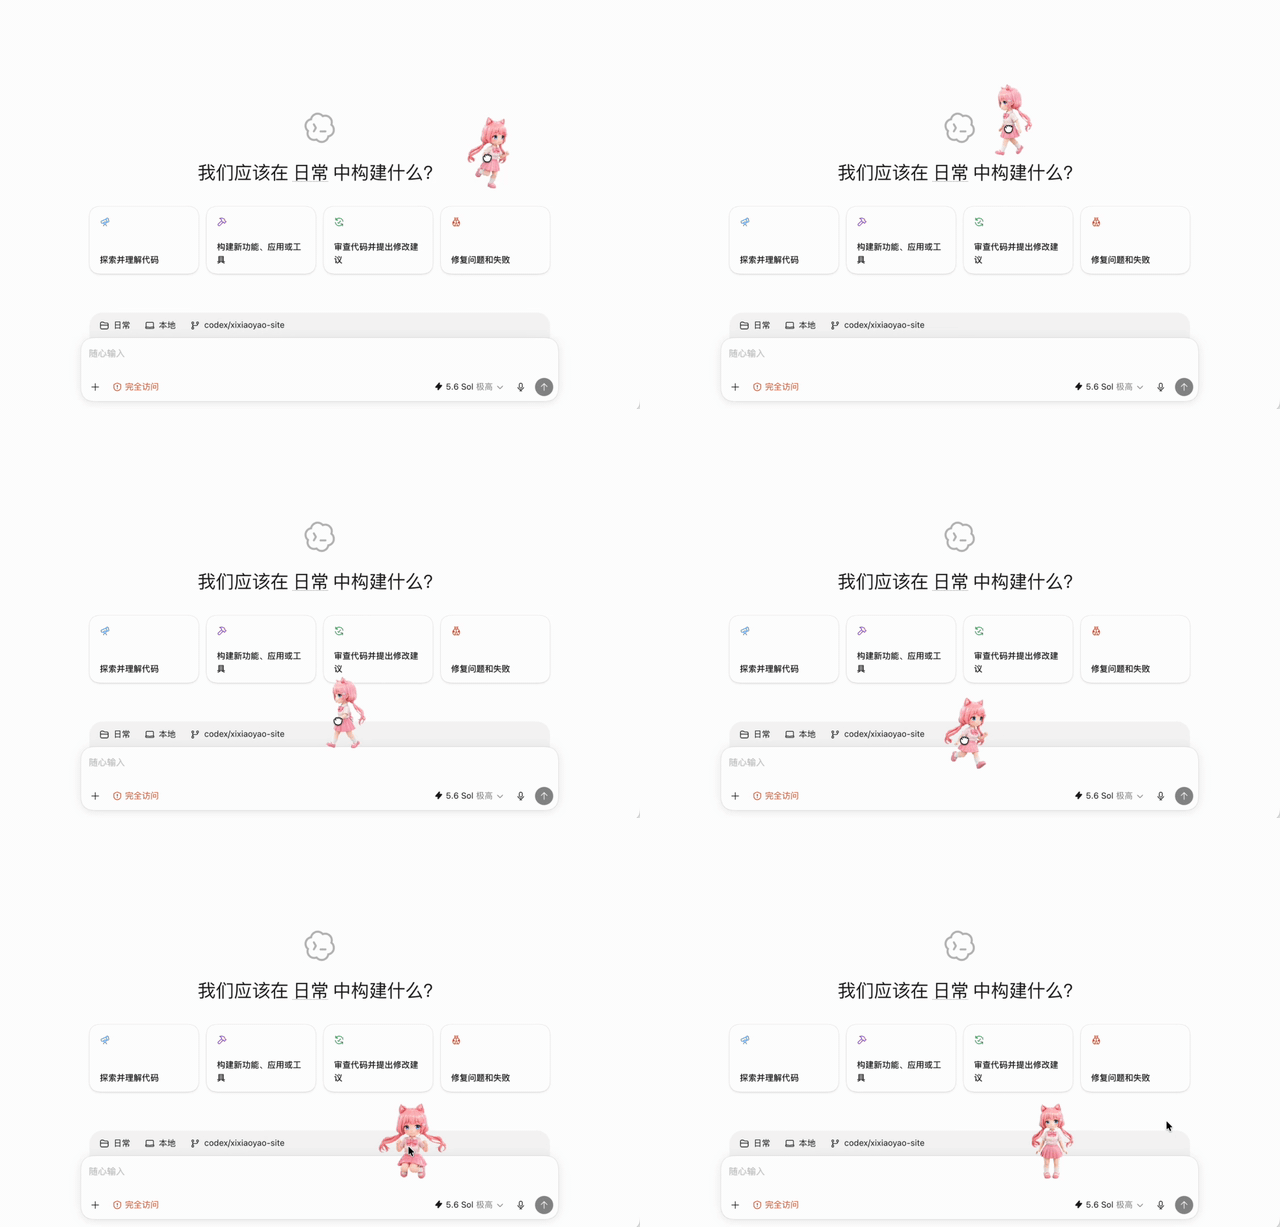
Build your own desktop pet for Codex. It switches animations based on Codex's task state: busy while working, stopping when it needs your confirmation, with different reactions for failed tasks and the checking phase. Hard to say how much efficiency it adds, but it beats staring at a single line of status text.
This step-by-step tutorial uses Hatch Pet, a curated Skill from the OpenAI Skills repository, starting from a single reference image and covering the full flow: generation, checking, installation, and wake-up. In our test it took about 1 hour and consumed 60% of the weekly usage allowance.
For developers who want a more visual Codex workflow and are willing to spend an afternoon tinkering.
Before You Start: 3 Things
1. The Codex App
A working Codex App with plenty of generation quota remaining.
2. A Character Reference Image
Requirements for the reference image:
- A single subject with a complete outline
- A simple background, front-facing or slightly turned
- Cut the details you can afford to lose: complex patterns, fine jewelry, and text will most likely blur into mush at desktop-pet size
The reference can be a real photo, an avatar, a pet photo, or an existing cartoon character.
3. Generation Quota and Time
Hatch Pet has to produce multiple animation sets, check them frame by frame, process transparent backgrounds, and package the files, which takes noticeably longer than ordinary image generation:
- Expected time: about 1 hour
- Expected quota: about 60% of a week's usage
Step Zero: Install Hatch Pet First
Hatch Pet is a curated Skill in the OpenAI Skills repository. If your Codex doesn't have it yet, click to create a new task and type this into the chat window:
$skill-installer hatch-petOnce the installation finishes, restart Codex so the new Skill gets loaded. After the restart, ask:
Can you use hatch-pet now?If Codex recognizes the Skill and can describe it, you're good to continue.
What Hatch Pet Actually Does
It isn't an image-generation prompt; it's a desktop-pet production line:
- You provide the reference image and character requirements
- It first locks in the main character design
- Then it produces the idle, move-left/right, wave, jump, fail, wait, run, and check animations
- Newer versions also add 16 observation directions afterward
- After image generation it keeps checking: whether the character has drifted, whether the animation skips frames, and whether the background is clean
- Finally it packages everything into files Codex can read
Step 1: Generate the Character Design Sheet
Hatch Pet can build the pet directly from a reference image, but strongly consider locking down the static main character first. Confirm "this is the look I want" before animating — the later animations need a stable reference.
How to Do It
- Upload the source material (photo / avatar / pet photo / cartoon character) to Codex
- Describe what kind of desktop pet you want: chibi, pixel, sticker, claymation, and flat illustration all work
- When the result comes back, check three things:
- Does it resemble the original character
- Is it still clear when scaled down
- Is it a design you'd genuinely want sitting on your desktop every day
💡 Tip: If something feels off, keep adjusting at this step — don't rush into animation generation. If you already have a complete character image you're happy with, you can skip generation and use it directly as the pet's main design.
Step 2: Hand the Image to Hatch Pet
Open a Codex task, upload the reference image, and send Codex this template prompt:
Please use $hatch-pet to turn the image I uploaded into a Codex desktop pet.
Pet name: [enter a name]
Use my uploaded image as the primary identity reference, keeping the face, proportions, main colors, and signature features consistent across all animations.
Confirm the main character design first, then generate the full animation set, and finish with visual checks, packaging, and installation.
After Submission, It Runs Through 4 Phases
- Getting ready — confirms the name, description, reference image, and style
- Imagining the main look — generates and locks in the main character, the visual baseline for all later animations
- Picturing the poses — generates the idle, move, wave, jump, fail, wait, run, and check animations one by one
- Hatching — assembles the animation atlas, runs checks, fixes failed items, and packages the files
💡 Tip: Animation generation is usually the slowest part — keeping one character consistent across multiple animation sets is far harder than generating a single grid image. If the UI sits still for a while, don't restart right away; check whether the progress checklist is still updating.
Step 3: Don't Install Yet — Check Against 5 Criteria First
When generation ends, hold off on the wake-up. Check these 5 items:
- Resemblance — the same character across every animation
- Clarity — outline, features, and main colors still recognizable when scaled down
- Smoothness — idle and walking loop naturally
- Correct states — the run, wait, fail, and check animations don't bleed into each other
- Clean background — no leftover color cast, black edges, or frayed outlines
Fixing a Single Broken Animation
If only one animation is wrong, don't regenerate the whole pet from scratch. Describe the problem precisely:
The character's hairstyle in the waiting animation doesn't match the main design.
Keep the other animations that already passed inspection, fix only the waiting set, and keep using the same main design as the identity reference.
Hatch Pet has built-in validation and visual inspection. Your job is to make "something feels off" specific: the character changed / the animation jumps / the direction is wrong / the background wasn't cleaned up.
Step 4: Install and Wake Up the Pet
Once checks pass, Hatch Pet packages the pet locally into two main files:
pet.json
spritesheet.webppet.json: tells Codex the pet's name and which animation sheet to usespritesheet.webp: stores the actual animation frames
They're usually placed together in:
~/.codex/pets/your-pet-name/Wake-Up Steps
- Go back to Codex's pet settings
- Select the newly generated character under custom pets
- Click wake up
💡 Tip: The exact menu wording may vary slightly between versions — go by your current UI. If you've updated the assets but nothing changed, switch to another pet and back; if it still doesn't update, try refreshing or restarting Codex.
Step 5: Let It Accompany a Real Codex Task
The pet appearing in the UI only proves the installation worked. The step actually worth trying is running a real task with your pet watching. Toss it something small from your own desk:
Read this raw meeting transcript, turn it into meeting minutes, and list the owners, deadlines, and open items.While the task runs, watch for:
- Whether it enters the running state
- Whether it stops and waits when it needs more information from you
- Whether the failed-task and checking animations are actually distinguishable
What you're evaluating here is whether the states are right, not whether the art is pretty.
FAQ
Q: Should the first attempt aim for perfection in every animation? No. Hand over one clear reference image and a few of the most important traits, and let Hatch Pet run the full loop: main design → animations → checks → install. Once it actually shows up in Codex, tune expressions and animations gradually around your most common work states.
Q: The pet didn't update after installing — what now? Switch to another pet and back; if it still doesn't change, try refreshing or restarting Codex.
Q: Which step fails most often? The animation generation phase. Keeping one character consistent across multiple animation sets is the hard part; if the UI sits still for a while, don't restart from scratch — check whether the progress checklist is still updating.
Q: What are the don'ts for reference images? Complex patterns, fine jewelry, and text will most likely end up blurred together. A desktop pet is tiny in the UI, so don't hesitate to delete details.