
Fully Automated AI Video Editing: A Three-Tool Stack for 100 Videos a Day
A HyperFrames + Remotion + Git three-tool stack for fully automated AI video editing, from HTML to React components, with complete install commands and pitfall notes.

Fully Automated AI Video Editing: A Three-Tool Stack for 100 Videos a Day
A HyperFrames + Remotion + Git three-tool stack for fully automated AI video editing, from HTML to React components, with complete install commands and pitfall notes.
With AI video, technology is no longer the bottleneck. HyperFrames handles "fast, batched content output," Remotion handles "premium polish," and Git handles "full-history backup as a safety net." Combined, the three tools achieve fully automated AI editing: finish your voiceover, toss it to Codex, and subtitles, cutting silences, generating visuals, stitching, and export all happen automatically.
How the Three Tools Relate
| Tool | Positioning | Tech stack | Best for |
|---|---|---|---|
| HyperFrames | Entry level, fast output | HTML + GSAP | Batch production, quick validation |
| Remotion | Mainstream, fine-grained animation | React components | Content that needs rich animation |
| Git | Safety net, code backup | Version control | Essential in every scenario |
Workflow: use HyperFrames to validate the visual style quickly, then polish with Remotion once you're satisfied, with Git covering you the whole way.
Before You Start
- Install Node.js (v22+ recommended)
- Have an AI coding agent ready (OpenClaw / Claude Code / Codex all work)
- Estimated time: 10-15 minutes for environment setup; rendering depends on complexity
Step 1: Quick Videos with HyperFrames
HyperFrames is an open-source video rendering framework from HeyGen (github.com/heygen-com/hyperframes). It works by writing animations in HTML + GSAP; the AI generates the code and it renders straight to MP4, and commercial use is completely free.
Installation and Initialization
Send the following prompt to your AI agent:
Help me complete the HyperFrames environment setup and project initialization.

Steps:
1. Check the Node.js version; if it's below 22, upgrade to the latest LTS
2. Install FFmpeg
3. Install the HyperFrames Skill: npx skills add heygen-com/hyperframes
   Use space to select the skill pack to install, Enter to confirm, choose Project as the install scope
4. Create the project: npx hyperframes init my-video --example blank
5. cd my-video, start the preview: npx hyperframes preview

Troubleshoot and fix any errors on your own at each step; don't ask me.
When everything is done, tell me the result of each step, the preview URL, and what I should do next.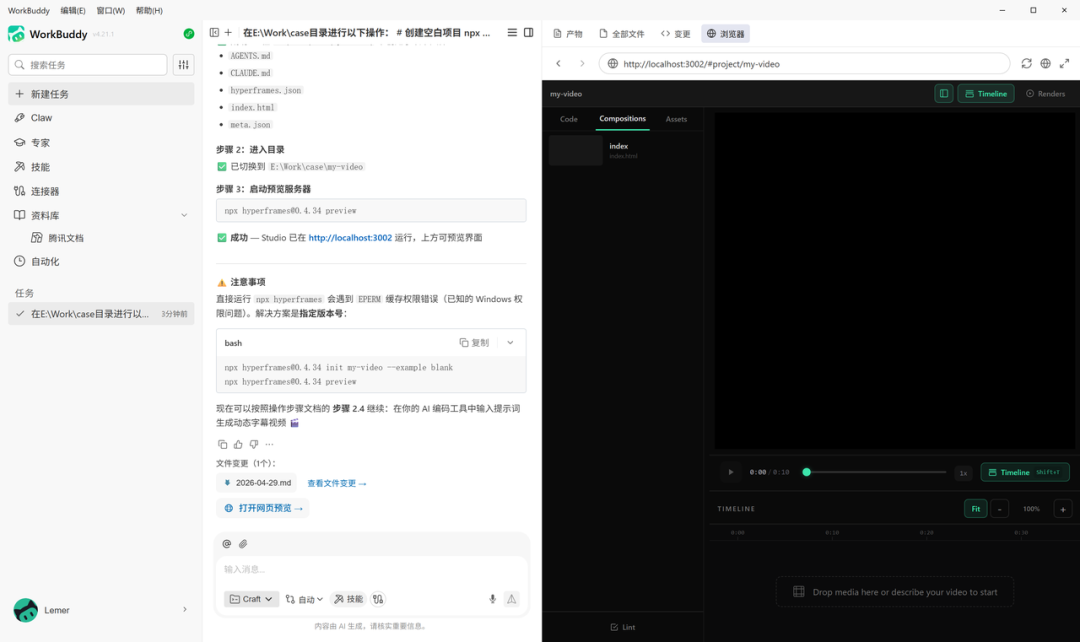
Turning a WeChat Article into a Video
1. Check whether the wechat-article-parser skill is installed; if not, install it with clawhub install wechat-article-parser
2. Once installed, parse this article: [paste your WeChat official account article link here]
3. Extract the title and core points, then use HyperFrames to make me a 30-second vertical video (3:4)

Video requirements:
- Dark background (#1A1A2E), white text
- Text slides in from below, each line holds for 3 seconds, GSAP animation
- Progress bar at the bottom advances over time
- Show the official account name at the end

Output index.html, and when done run the render command directly:
npx hyperframes render --output final.mp4
Tip: if you want an avatar or images in the video, first create a fixed assets directory in the project (for example
my-video/assets/), put the images there, and then generate.
Step 2: Fine-Grained Animation with Remotion
Remotion is a "video as code" framework: every frame is described by a React component, then rendered to MP4. The results are finer than HyperFrames, but AI writing React is harder than writing HTML, so expect 2-3 rounds of iteration.
Installation and Initialization
Help me complete the Remotion environment setup and project initialization.

Steps:
1. Install Bun
   Windows PowerShell in admin mode: powershell -c "irm bun.sh/install.ps1 | iex"
   macOS / Linux: curl -fsSL https://bun.sh/install | bash
2. Create the project: bun create video, choose the Blank or Hello World template
3. bun install
4. bun run dev

Handle any errors yourself; when done, tell me the address that opens in the browser.
Common Pitfalls
Problem 1: the bun command isn't recognized after installing Bun (Windows). Fix: have the agent run ls $env:USERPROFILE\.bun\bin, find the path, and add it to the system environment variables.
Problem 2: bun run dev reports a port conflict. Windows Hyper-V reserves ports 2929-3228 by default; switch to a port outside that range: $env:PORT=8080; bun run dev.
Generating the Video
Help me make an article promo video with Remotion.

First fetch the content at this WeChat official account link: [insert link]
Extract the title and core points, output the timeline plan first, and write the component code only after I confirm.

Specs: 30 seconds, 30fps, 1080x1920 vertical
Animation: opening title scales up from center, points slide in from the right one by one, key numbers scale up and get highlighted, closing brand signature fades in
Colors: deep blue background (#1A1A2E), white text
Use bun run render as the render command
Tip: don't let the AI skip the "output the timeline first" step and jump straight to code — otherwise the pacing will almost certainly be wrong throughout, and fixing it costs more than starting over.
Step 3: Full-History Backup with Git
When AI writes code to make videos, you must use Git for version control so a bad edit can always be rolled back.
Initialize Git in the current project directory and manage versions throughout.

1. Initialize: git init && git add . && git commit -m "init: initial project structure"
2. From then on, whenever I say "this version is good, save it for me," automatically run git add . && git commit
3. When I say "it broke, go back to the previous version," first show me the history with git log --oneline, and after I pick one, roll back with git reset --hard
Key habit: commit after every small module works — don't let changes pile up. Save them all for one final commit, and a break means falling back to a version from ages ago.
The Complete Workflow, Summarized
- Write the script: decide what each page shows and what the copy says
- Stage assets: screenshots, icons, avatars all go into a fixed directory
- Validate with HyperFrames: run a quick HTML version and confirm the visual style
- Plan the timeline: have the AI output the timeline first; write components only after human confirmation
- Polish with Remotion: 2-3 rounds of iteration is normal, with Git commits at each step
Making videos with code used to stall on the technology. Now technology isn't the problem — the real bottleneck is taste and content, and that's the one thing AI can't do for you.