
Getting Started with Claude Code from Scratch: A Step-by-Step Installation Guide for Users in China
No overseas phone number or Visa card required — Claude Code runs on domestic models too. A complete installation walkthrough for both Mac and Windows, from installing the framework to connecting GLM-5.1.
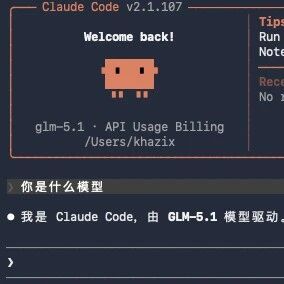
Getting Started with Claude Code from Scratch: A Step-by-Step Installation Guide for Users in China
No overseas phone number or Visa card required — Claude Code runs on domestic models too. A complete installation walkthrough for both Mac and Windows, from installing the framework to connecting GLM-5.1.
Claude Code is widely recognized as the strongest AI coding agent framework today. Many people believe it only works with Anthropic's official Claude models, but in fact Claude Code is at its core an agent framework that runs with any model. This article walks you through installing Claude Code from scratch and hooking it up to the domestic model GLM-5.1 — no overseas phone number, no Visa card, and not even a proxy needed.
Before You Start
- OS: macOS or Windows both work
- Network: A proxy is best, but it also works without one (this guide covers both options)
- Model: GLM-5.1 recommended (the domestic model closest to Claude Opus 4.6); MiniMax M2.7 or K2.5 also work
- Estimated time: 30-60 minutes (depending on your connection)
- Cost: Free
Step 1: Install the Claude Code Framework
macOS Installation
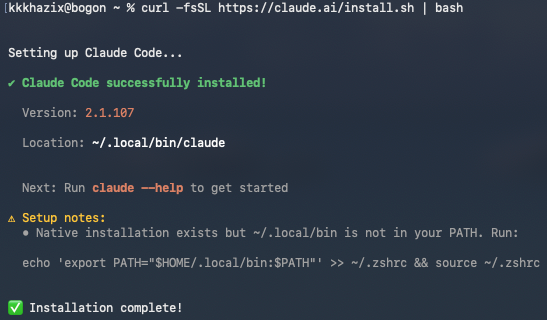
Users with a proxy, open a terminal and run a single command:
curl -fsSL https://claude.ai/install.sh | bashIf you're told PATH is not configured, run the echo command the installer prints, then run claude --version to verify the installation.
Users without a proxy, install Homebrew first:
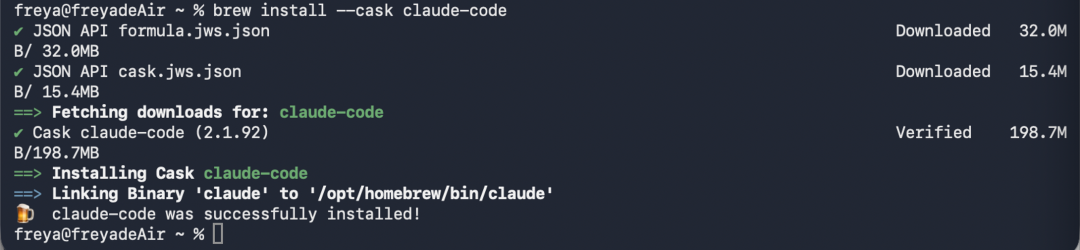
/bin/bash -c "$(curl -fsSL https://raw.githubusercontent.com/Homebrew/install/HEAD/install.sh)"Once the install finishes, add Homebrew to your PATH (you'll be prompted at the end), then install Claude Code with Homebrew:
brew install --cask claude-code@latestWhen it's done, type claude and you'll see the launch screen.
Windows Installation
Claude Code uses Git Bash internally on Windows, so you must install Git first.
Open a terminal (search "Terminal" in the taskbar) and run:
winget install Git.GitUsers with a proxy, once Git is installed, run:
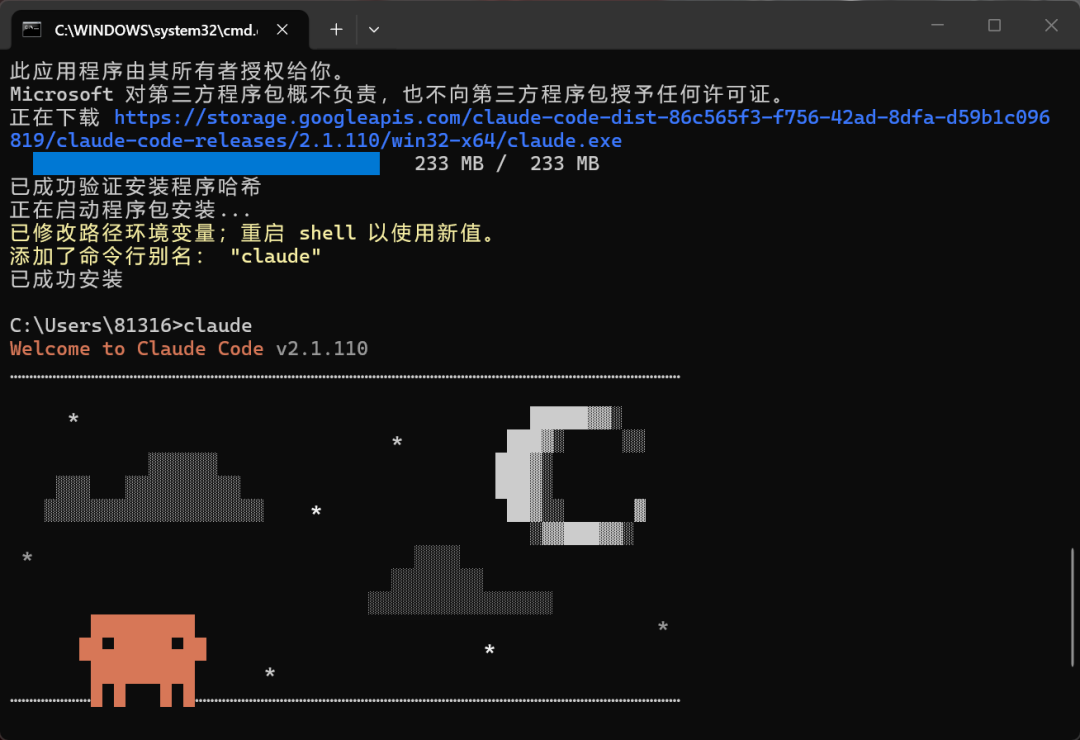
irm https://claude.ai/install.ps1 | iexUsers without a proxy, install with WinGet:
winget install Anthropic.ClaudeCodeAfter installation, type claude in the terminal to verify.
Step 2: Install CC Switch to Connect Domestic Models
At this point the framework is installed, but it still has no "brain". The CC Switch tool makes it easy to connect domestic models and switch between them at any time.
Install CC Switch on macOS
brew tap farion1231/ccswitch
brew install --cask cc-switch
Install CC Switch on Windows
Go to the CC Switch Releases page, download the installer, and double-click to run it.
Configure the Model
Open CC Switch, click the plus sign in the top-right corner under the Claude tab, and add a new model configuration:
- Choose the target model (e.g., GLM domestic edition)
- Enter your API Key
- Confirm the model configuration (most fields auto-fill)
- Click Add
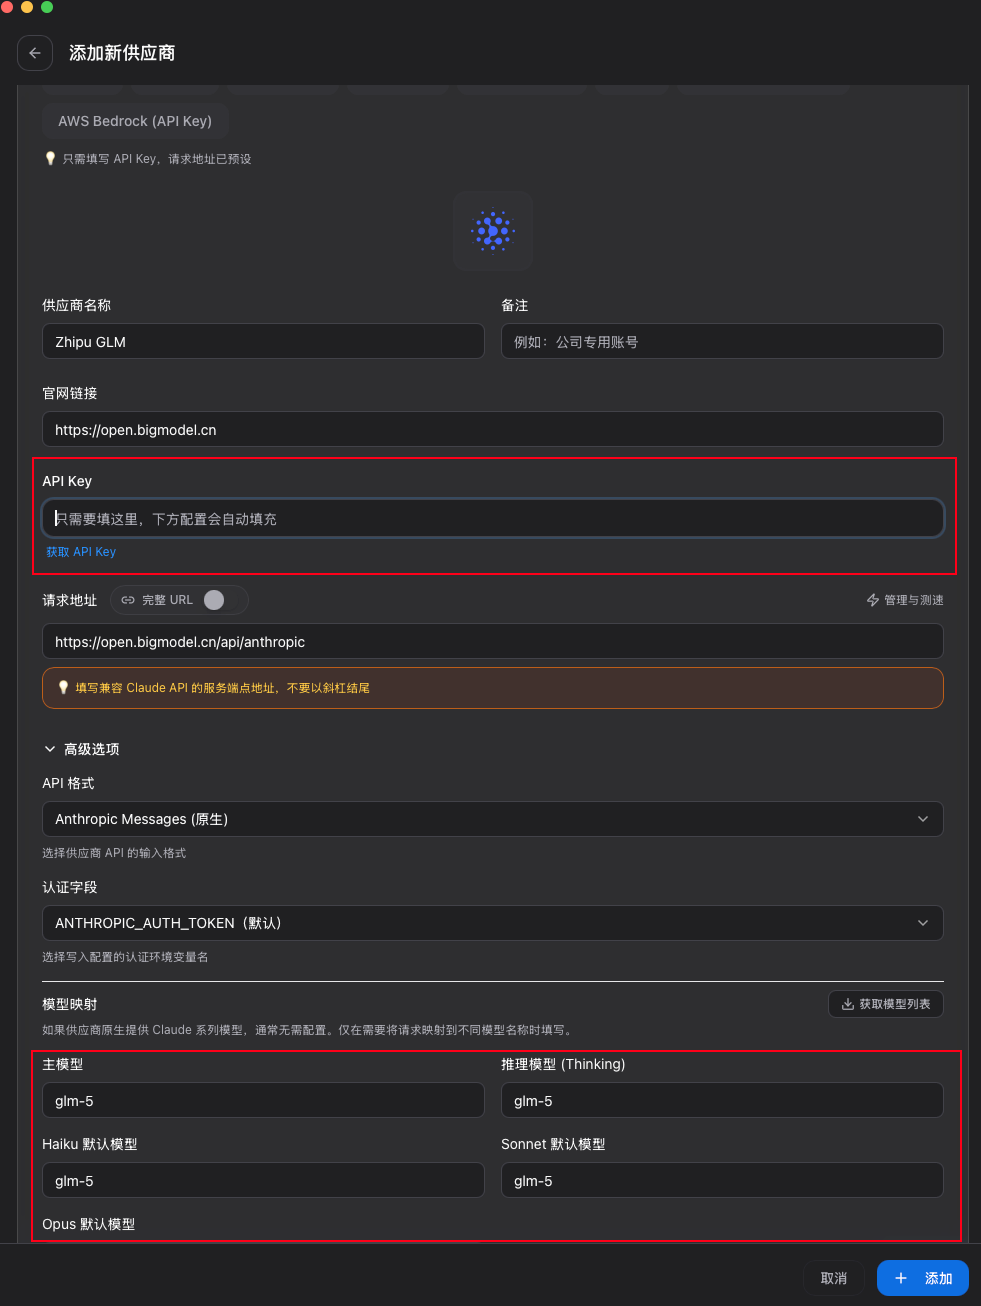
Once configured, CC Switch automatically switches to the new model.
Step 3: Launch and Configure Claude Code
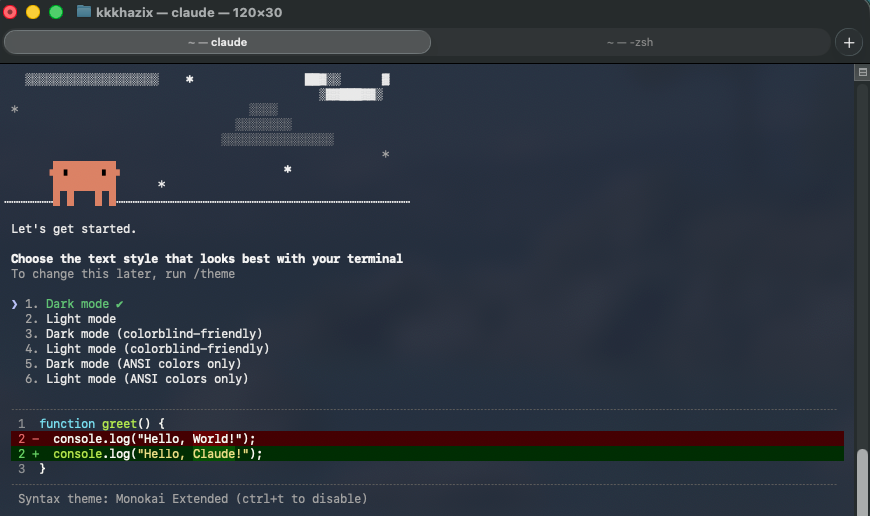
Type claude in the terminal to launch. The first run walks you through initial setup:
- Choose a theme: Pick the color mode you like; you can change it later with
/theme - Safety notice: Confirm you understand that AI can make mistakes, and that reviewing generated code is recommended
- Terminal settings: Use the recommended terminal settings (keyboard shortcut for newlines + visual hints)
- Trust the directory: Confirm the current working directory is trusted
Tip: It's recommended to launch with
claude --dangerously-skip-permissions, which saves you from clicking allow over and over. But make sure you only use it in trusted project directories.
Step 4: Write the CLAUDE.md Configuration File
CLAUDE.md is Claude Code's rulebook, and it works on two levels:
- Global level: placed at
~/.claude/CLAUDE.md, loaded for all projects - Project level: placed as
CLAUDE.mdin a project's root directory, effective only in that project
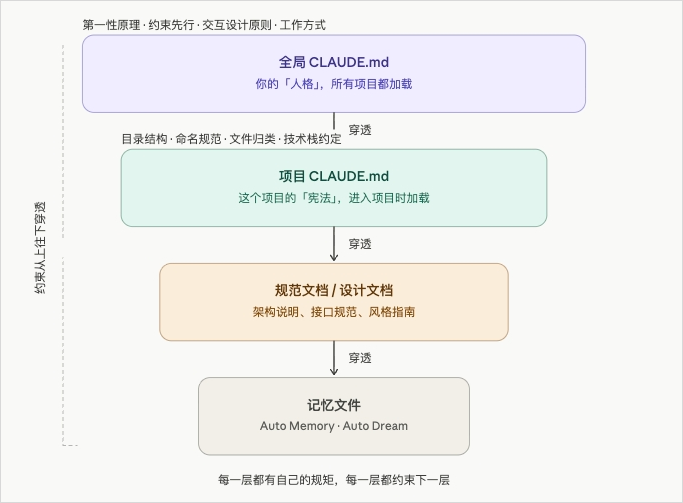
Key caveat: keep CLAUDE.md under 80 lines; beyond 200 lines, Claude ignores the second half.
Here is a global CLAUDE.md template you can reuse as-is:
## About Me
[YOUR NAME / ROLE / PROFESSIONAL BACKGROUND — non-programmers should absolutely spell this out]
I use Claude Code for [specific use 1] and [specific use 2]

## Thinking Principles
Base every decision on the essence of the problem — never copy an approach just because "that's the convention"
No flattery, no praising my ideas — give me your honest judgment
If you find a better approach, say so directly; don't wait for me to ask

## Constraints First
New project: write CLAUDE.md first; new directory: set structure conventions first
Don't touch a workspace with no conventions in place
When conventions need to change, update the docs first, then the practice

## Communication Style
Chinese by default; English for code and variable names
Conclusion first, then the reasoning
For vague requirements, give the most reasonable solution first, then ask about adjustments

## Autonomy Boundaries (red lines — always ask me first)
Deleting files, directories, or git history
Modifying .env, secrets, tokens, or CI/CD configuration
git push, git rebase, git reset --hard
Public releases (npm publish, deploying to production, etc.)

## General Engineering Discipline
Run verification proactively after every change — never change without verifying
Don't comment out errors just to make things run; find the root cause
Secrets and tokens never go into code or commits
For big changes, draft a plan in Plan Mode first and confirm before acting
Common Operations
- Switch models: type
/modelin Claude Code to switch among your configured models - Enter the project directory:
cdinto the target folder and typeclaudeto launch, so the context stays focused - Project-level CLAUDE.md: just chat with Claude Code inside the project and ask it to generate one for you
FAQ
- "command not found" when typing claude after installing: the install path needs to be added to PATH; run the command shown in the closing installation instructions
- What if I don't have an API Key: register on the relevant model's open platform and create a Key; there's usually a free quota
- Installation fails on Windows: make sure Git is installed and that the terminal you use is PowerShell or Windows Terminal
Toolin Editorial Team
Categories
Related articles
Codex Record & Replay: Do It Once, and the AI Learns to Do It for You
OpenAI launches Record & Replay for Codex — record your workflow on your Mac and it automatically becomes a reusable Skill. Time to rethink automation.

Odysseus: A Local ChatGPT Hand-Built by a Top YouTuber, 30,000 Stars in 3 Days
Former world's #1 YouTuber PewDiePie open sourced a fully self-hosted AI workspace — free, no tracking, with a built-in Agent — pulling in 30,000 stars in three days.

Xiaomi Miloco 2.0: Smart Homes Finally Get a True AI Steward
Xiaomi open sources its whole-home AI solution Xiaomi Miloco 2.0 — multimodal perception, proactive intelligence, and household memory bring the Agent into the smart home ecosystem.

Agnes AI Makes Its Omnimodal API Free Indefinitely, with 1M Context and 4K Image Generation Upgrades This Week
Agnes AI has opened its text, image, and video omnimodal model APIs for free indefinitely, with 1M ultra-long context and 4K ultra-HD text-to-image upgrades landing this week.

Hands-On with the AI Version of Alipay: Order McDonald's and Collect Energy with a Single Sentence
The AI version of Alipay has entered beta testing with an AI assistant named A Bao that operates mini programs on command; this post covers how to get an invitation code plus the hands-on experience.
Major Claude Design Update: One-Click Design System Import and Two-Way Code Sync
Anthropic has shipped a major Claude Design update with design system import, two-way /design-sync and /design code sync, and one-click export to 9 platforms.